Posts tonen met het label challenge. Alle posts tonen

zaterdag 1 mei 2021

International Scrapbook Day; Pictures on a Slimline Card!

Today it's international scrapbookday. For that reason ThermOWeb has a fun challenge on their blog and ofcourse I joined it!                         * Vandaag is het internationale scrapbookday. Om die reden heeft ThermOWeb een leuke uitdaging op hun blog en daar doe ik natuutlijk aan mee!
Before I start showing the project I made, let me tell you my story how I got started my blog and being creative... I started in 2011, by watching video's on youtube and suddenly came accros a video's from "Two Peas in a Bucket" (now the shop is closed but is was such a creative shop). It was amazing what they did with papers!! I did want to do that too, but I didn't had any supplies. I printed my own pattern paper and drew my embellishments (It looked horrible lol). Later I shopped for the first time online, it was expensive because of the taxes, but I loved createting scrapbooklayouts. I actually thought the small 4x8 inch layouts and vacation books were super fun to make. When I got my first Copic Markers from my husband, I was totally hooked on cardmaking. I completly forgot about scrapbooking. Is it horrible to say I still need to make my wedding album after 2 years?                         * Voordat ik het project dat ik heb gemaakt ga laten zien, wil ik je mijn verhaal vertellen hoe ik aan mijn blog ben begonnen en met de creatieve projectjes... Ik begon in 2011 door video's op youtube te bekijken en kwam plotseling een video tegen van "Two Peas in a Bucket" (nu is de shop gesloten, maar het was een heel creatieve shop). Het was verbazingwekkend wat ze deden met papieren !! Ik wilde dat ook doen, maar ik had geen materiaal. Daarom drukte ik mijn eigen patroonpapier af en tekende ik mijn versieringen (het zag er vreselijk uit lol). Later begon ik het online winkelen te leren kannen, het was duur vanwege de taxen, maar ik vond het geweldig om plakboeklay-outs te maken. Ik vond de kleine lay-outs van 4x8 inch en vakantieboekjes eigenlijk het leukst. Toen ik mijn eerste Copic Markers van mijn man kreeg, was ik helemaal verslaafd aan het maken van kaarten. Ik vergat het scrapbooken. Is het erg om te zeggen dat ik na 2 jaar nog steeds mijn trouwalbum moet maken?

#TOW  #handmadecard  #cardmaking  #stamping  #hellocard  #friendshipcard  #thermoweb  #foil #decofoil  #flock #internationalscrapbookdau #scrapbook #slimline #slimlinecards #pictures #card  #cardmaking  #handmade  #stampset  #dieset  #paperart  #hobby  #drawing  #Hellobluebird #AveryElle #TwiddlersNook  #TonerCardFronts #loveblooms

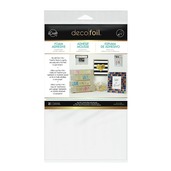
Today I incorporated the sketch from ThermOWeb into a card (for a sweet friend of me). Slimline cards are just perfect for this!                         * Vandaag heb ik de sketch van ThermOWeb in een kaartje verwerkt (dat voor een super lieve vriendin is). Slimline kaartjes zijn hier gewoon perfect voor!

#TOW  #handmadecard  #cardmaking  #stamping  #hellocard  #friendshipcard  #thermoweb  #foil #decofoil  #flock #internationalscrapbookdau #scrapbook #slimline #slimlinecards #pictures #card  #cardmaking  #handmade  #stampset  #dieset  #paperart  #hobby  #drawing  #Hellobluebird #AveryElle #TwiddlersNook  #TonerCardFronts #loveblooms

Be sure to take part in the thermOweb challenge, because you can win a nice prize with it!                         * Doe zeker mee aan de uitdaging van ThermOWeb, je kan er namelijk een leuke prijs mee winnen!


donderdag 30 april 2020

Glittery Fruit Cards with Glitz Glitter Gel

Hello friends, I'm here today with a tropical project. It features some of the newest products from ThermOWeb and they are also perfect to brightens someone’s day.                * Hallo vrienden, ik ben hier vandaag met een tropisch thema. De kaarten tonen eveneens enkele nieuwe producten van ThermOWeb en ze zijn ook perfect om iemands dag op te fleuren.


On both card I used the “Sending Sunshine” set. The stamp set has not only a coordinating die, but also a stencil. This makes it possible to apply a layer with the Glitz Glitter gel. That creates a nice effect on the cards. On the ThermOWeb blog I show how I made both cards. First I introduce the card with orange slices, using "Sweet Mango" Glitz Glitter Gel and the "Screamin' Green" enamel for the word "smile".                * Op beide kaarten heb ik de "Sending Sunshine" set gebruikt. De stempel set heeft niet alleen een coördinerende snijmal, maar ook een sjabloon. Hierdoor is het mogelijk om een laagje met de Glitz Glitter gel aan te brengen. Dat zorgt echt voor een leuk effect op de kaarten. Op de ThermOWeb-blog laat ik stampgewijs zien hoe ik beide kaarten heb gemaakt. Eerst laat ik de kaart met de stukjes sinaasappel zien, waarbij ik ‘Sweet Mango’ Glitz Glitter Gel en de "‘Screamin’ Green" enamel voor het woord 'smile' gebruik.


The second card is one with pineapples that has the neon enamel "Poppin 'Pink" in the text.                * De tweede kaart is er een met ananassen die de neon enamel "Poppin’ Pink" heeft in de tekst.


Are you sending more cards these days? I think it's so nobel to spread some love by sending cards. I hope these cards give you some inspiration to do the same. Don't forget to check the ThermOWeb blog for more details on these cards.                * Stuurt jij tegenwoordig meer kaarten? Ik vind wel nobel om wat liefde te verspreiden door kaarten te sturen. Ik hoop dat deze kaarten je wat inspiratie geven om hetzelfde te doen. Vergeet niet de ThermOWeb-blog te bekijken voor meer informatie over deze kaarten.


https://www.thermowebonline.com/p/gina-k-designs-glitz-glitter-gel-–-sweet-mango/crafts-scrapbooking_gina-k-designs_glitz-glitter-gel?pp=24 https://www.thermowebonline.com/p/deco-foil-stencil-pal/crafts-scrapbooking_deco-foil_tools?pp=24 https://www.thermowebonline.com/p/rina-k-designs-stampnstencil-stamp-set-sending-sunshine/crafts-scrapbooking_rina-k-designs_stampnstencil?pp=24 https://www.thermowebonline.com/p/rina-k-designs-stampnstencil-detail-stencil-sending-sunshine/crafts-scrapbooking_rina-k-designs_stampnstencil?pp=24 https://www.thermowebonline.com/p/gina-k-designs-stampnstencil-die-set-petals-wings/crafts-scrapbooking_gina-k-designs_stampnstencil?pp=24 https://www.thermowebonline.com/p/gina-k-designs-stampnstencil-stamp-set-petals-wings?pp=24  https://www.thermowebonline.com/p/gina-k-designs-permanent-adhesive-dot-runner/crafts-scrapbooking_gina-k-designs_adhesives?pp=24 https://www.thermowebonline.com/p/gina-k-designs-foam-squares-white-320-squares/crafts-scrapbooking_gina-k-designs_adhesives?pp=24 https://www.thermowebonline.com/p/rina-k-designs-neon-enamel-transfer-sheets-screamin-green/crafts-scrapbooking_rina-k-designs_enamel-transfer-sheets?pp=24 https://www.thermowebonline.com/p/rina-k-designs-neon-enamel-transfer-sheets-poppin-pink/crafts-scrapbooking_rina-k-designs_enamel-transfer-sheets?pp=24 https://www.thermowebonline.com/p/deco-foil-white-foam-adhesive?pp=24


https://www.simonsaysstampblog.com/wednesdaychallenge/simon-says-anything-goes-72/

woensdag 19 juni 2019

Inky Paws 100th Challenge!

I'm so happy to be part of the 100th Inky Paws Challenge!! Part of the Newton's Nook Designs team is showing some cards for this occasion..             * Ik ben zo blij om deel uit te maken van de 100ste Inky Paws Challenge!! Een deel van het Newton's Nook Designs-team toont enkele kaarten voor deze gelegenheid


The name of the 100th challenge is"Copy Cat". Why? Because you can pick any of our previous Color, Sketch or Theme challenges and play it again! That's how easy it is.             * De 100ste uitdaging noemt "Copy Cat". Waarom? Omdat je een van de vorige Color-, Sketch- of Theme-uitdagingen kunt kiezen en deze opnieuw kunt spelen! Zo eenvoudig is het.

 
I liked the idea so much that I made two cards. Each time I choose a different challenge. The first card was created with challenge #26, a color challenge (find here my original post). Although I used two different challenges, I still used the same card design.             *  Ik vond het idee zo leuk dat ik twee kaarten heb gemaakt. Elke keer koos ik voor een andere uitdaging. De eerste kaart is gemaakt met uitdaging # 26, een kleure-uitdaging (vind hier mijn originele bericht). Hoewel ik twee verschillende uitdagingen gebruikte, gebruikte ik nog steeds hetzelfde kaartontwerp.


Both cards are interactive. Let me explain how I made it.
            * Beide kaarten zijn interactief. Laat me uitleggen hoe ik het heb gemaakt.


1. First you create all background elements. For both cards I used sun, sea and sand. I'm in a summer mood, is that obvious? Cut also two acetate strips. These strips will make the card interactive later on.             * 1. Eerst maak je alle achtergrondelementen. Voor beide kaarten heb ik een zon, zee en zand gebruikt. Ik ben in een zomerse bui, valt het op? Snijd ook twee doorschijnende stroken. Deze strips zullen de kaart later interactief maken.
2.  Attach your interactive element on one of the acetate strips. You can use a ship, shark, airplane, or any other interactive element for this.             * 2. Bevestig je interactief element op een van de doorschijnende stroken. Je kan hiervoor een schip, haai, vliegtuig of een ander interactief element gebruiken.
3. Make two holes in the acetate piece with the object (here the ship) and one in the other acetate. Attach both acetates on the bottom whole with a small brad. As you can see I also added a tab on the second acetate.             * 3. Maak twee gaten in de transparante strook met het voorwerp (hier het schip) en één in de andere strook. Bevestig beide doorschijnende strips op het onderste gaatje met een splitpen. Zoals je kunt zien, heb ik ook een tab waaraan je kan trekken gelijmd op de 2de strook.


4. On the next step I place my ship on the background of my card. Attach the acetate with the 2nd brad onto your paper. Please note that the other brad only joins the 2 strips of acetate (you do NOT attach it to paper!).             * 4. Bij de volgende stap plaats ik mijn schip op de achtergrond van mijn kaart. Bevestig de vervolgens de transparante strook met een splitpen doorheen het andere gaatje op je papier. Merk op dat de andere splitpen alleen de 2 transparante stroken verbindt (deze bevestig je NIET aan papier!).
5. On the sides I glued double sided tape to give the acetate a little bit of boundaries while you pull the strip.             *5. Aan de zijkanten heb ik dubbelzijdig plakband geplakt om de doorschijnende stroken grenzen te geven voor wanneer je het in beweging brengt.

Below I uploaded a small video, so you have an idea how it works.             *Hieronder heb ik een kleine video geüpload, zodat je een idee hebt hoe het werkt.


The end result is just stunning!             *Het eindresultaat is gewoon verbluffend!


The second card was inspired by challenge #36, a Halloween themed challenge (find here my original post for that challenge).              * De tweede kaart was geïnspireerd op challenge # 36, een uitdaging met een Halloween-thema (vind hier mijn originele bericht voor die uitdaging).


At first glance, the card does not look like Halloween. I wanted to show you that you can play creatively with challenges. I used many happy summer images, but I still colored the elements with typical Halloween colors.             * De kaart ziet er op het eerste zicht niet echt Halloween achtig uit. Ik wilde je laten zien d creatief mee kunt spelen met uitdagingen. Ik heb veel vrolijke zomerafbeeldingen gebruikt, maar heb nog steeds de elementen ingekleurd met typische Halloween-kleuren.


This was so much fun and I really hope you will join. For the 100th celebration Newton's Nook Design is giving away $100 in prizes!! So be sure to check the Inky Paws Challenge Blog it out!             * Dit was zo leuk en ik hoop echt dat je meedoet. Voor de 100e viering geeft Newton's Nook Design $100 aan prijzen weg !! Zorg er dus voor dat je de Inky Paws Challenge Blog bekijkt!