Posts tonen met het label interactive series. Alle posts tonen

vrijdag 15 december 2023

Mini Christmas Shaker Cards


Christmas will be here before you know it and if you haven’t started making your Christmas cards yet, now is the perfect time to get started. I’m sharing how to create mini Christmas Shaker Cards on the Newton's Nook Designs blog.                        * Voordat je het weet is het Kerstmis en als je nog niet bent begonnen met het maken van je kerstkaarten,dan is het zeker nu de perfecte moment om te beginnen. Ik deel op de Newton's Nook Designs-blog hoe je mini-kerst-shakerkaarten maakt.


I used their special shaker dies.                        * Ik gebruikte hun speciale shaker snijmallen.


I also used paper and hot foil in the background. If you want more information, check it out on the NND blog!                         * Op de achtergrond gebruikte ik ook papier en hot foil. Als je meer informatie wil, bekijk het dan even op de NND blog!

donderdag 27 april 2023

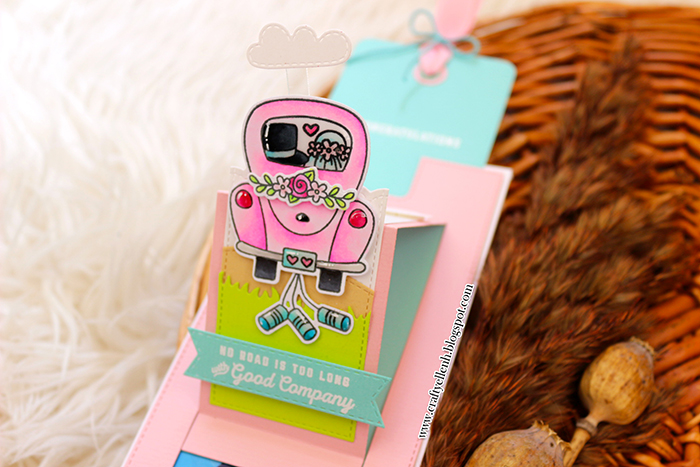
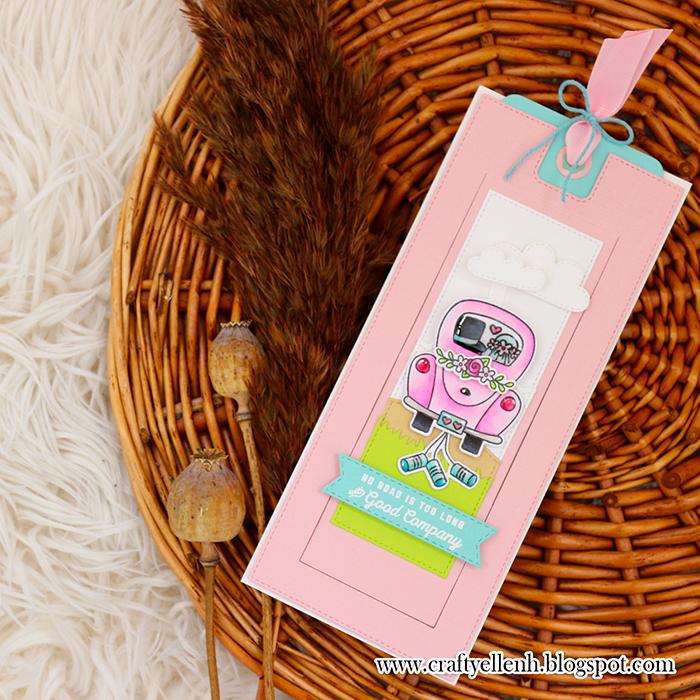
Interactive and Personal Wedding card

#heffydoodle #spellbinders #newtonsnookdesigns #weddingdiy #cardmaking #newtonsnook #love #cricut #weddinginspiration #carmaking #cardmakersofinstagram #weddingideas #stamping #papercraft #papercrafting #cricutmade #etchedglass #handmadecard #neverstopmaking #diybride #scrapbooking #weddingday #cricutmaker #weddingdiyseries

When you follow me on my instagram you saw already this wedding card made for my best friend. Today I show it on my blog.                        * Als je me volgt op mijn instagram zag je al deze trouwkaart gemaakt voor mijn beste vriendin. Vandaag wil ik hem hier tonen.

#heffydoodle #spellbinders #newtonsnookdesigns #weddingdiy #cardmaking #newtonsnook #love #cricut #weddinginspiration #carmaking #cardmakersofinstagram #weddingideas #stamping #papercraft #papercrafting #cricutmade #etchedglass #handmadecard #neverstopmaking #diybride #scrapbooking #weddingday #cricutmaker #weddingdiyseries

With the dies from Heffy Doodle I made the pop up base. Later I decorated it with different products from Newton's Nook, Lawn Fawn and Spellbinders.                        * Met de stansen van Heffy Doodle heb ik de pop-up basis gemaakt. Later heb ik het versierd met verschillende producten van Newton's Nook, Lawn Fawn en Spellbinders.

#heffydoodle #spellbinders #newtonsnookdesigns #weddingdiy #cardmaking #newtonsnook #love #cricut #weddinginspiration #carmaking #cardmakersofinstagram #weddingideas #stamping #papercraft #papercrafting #cricutmade #etchedglass #handmadecard #neverstopmaking #diybride #scrapbooking #weddingday #cricutmaker #weddingdiyseries

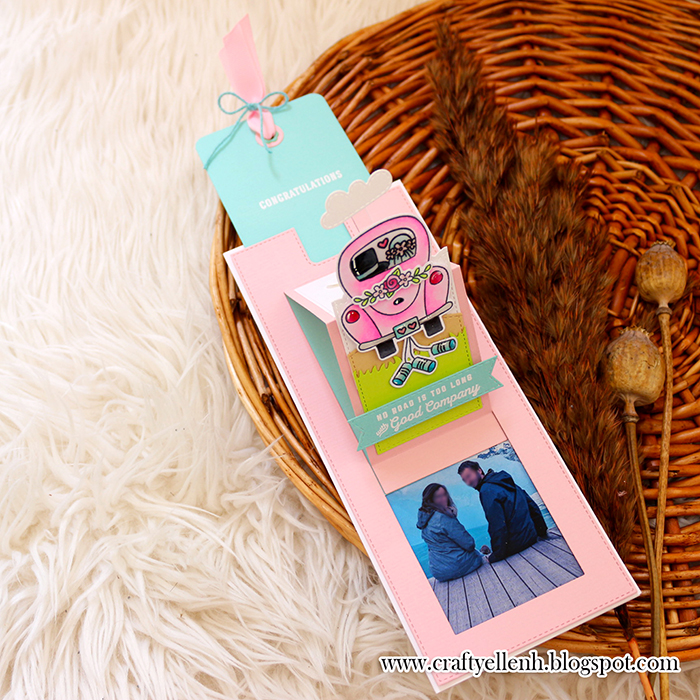
I love to make cards for big events personal, so I did include a picture from the happy couple.                        * Ik hou ervan om kaarten voor grote evenementen persoonlijk te maken, dus heb ik een foto van het gelukkige koppel bijgevoegd.

#heffydoodle #spellbinders #newtonsnookdesigns #weddingdiy #cardmaking #newtonsnook #love #cricut #weddinginspiration #carmaking #cardmakersofinstagram #weddingideas #stamping #papercraft #papercrafting #cricutmade #etchedglass #handmadecard #neverstopmaking #diybride #scrapbooking #weddingday #cricutmaker #weddingdiyseries

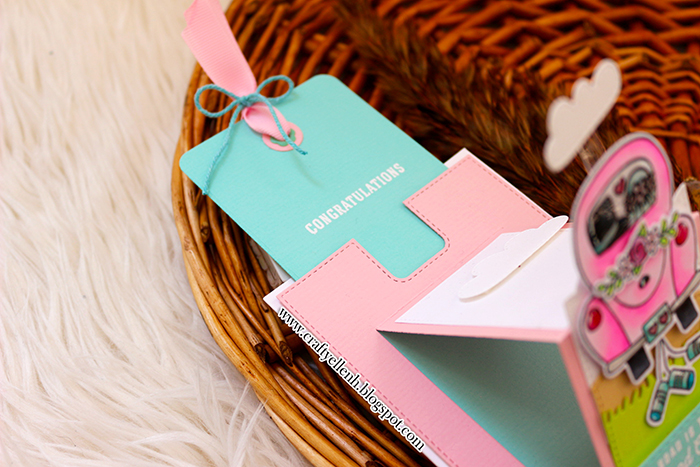
When you pull on the ribbon not only the picture wil apear, but also a congratulations.                        * Bij het trekken aan het lint verschijnt niet alleen de foto, maar ook een felicitatie.

See you tomorrow with more inspiration!                        * Tot morgen met meer inspiratie!

donderdag 20 juni 2019

Secret Speech Bubble Messages

Welcome to my blog again! Today I have my monthly blogpost for Newton's Nook Design a little bit earlier as usual.             *  Ik heet je opnieuw welkom op mijn blog! Vandaag heb ik mijn maandelijkse blogpost voor Newton's Nook Design een beetje vroeger dan gewoonlijk.


This card is using the "Speech Bubble" dies as door to hide a message inside. Let me show you how you can make it yourself:             * Deze kaart gebruikt de "Speech Bubble" stans als deur om een ​​bericht binnen te verbergen. Laat me je tonen hoe je dit zelf kan doen:


1. Tape your background paper and the front of the card. I used removable tape for this. You can cut the background paper and card base together. This ensures they match exactly.             * 1. Plak hje achtergrondje op de voorkant van de kaart vast. Ik heb hiervoor verwijderbare tape gebruikt. Je kunt het achtergrondpapier en de kaartbasis samen snijden. Dit zorgt ervoor dat ze exact overeenkomen.

2. After that, it’s time to color the front. First I arranged the sentiments from the "Cluck" stamp set and stamped them with embossing powder. Afterwards I inked the panel with blue distress ink.             * 2. Daarna is het tijd om de voorkant te kleuren. Eerst arrangeerde ik de tekst van de "Cluck" stempelset en stempelde ze met embossingpoeder. Daarna heb ik het paneel gekleurd met blauwe distress-inkt.

3. The final step is to make the inside of the card. I started to cut out a similar rectangle. I also stamped the text in embossing powder, but now with gold powder. After I cut out the grass I colored all the pieces (including the stamped illustrations). The final step was to stick grass and critters on the bottom of the panel with or without 3D foam.
             * 3. De laatste stap is om de binnenkant van de kaart te maken. Ik begon een soortgelijke rechthoek uit te snijden. Ook hier stempelde ik de tekst in embossingpoeder, maar nu met goude poeder. Nadat ik het gras uitsneeds kleurde ik alle stukken in (inclusief de gestempelde illustraties). De laatste stap was om gras en beestjes al dan niet met 3D foam op op de bodem van het paneel te plakken.


I love that you can create a complete conversation with the text stamps from the "Cluck" stamp set. It's just perfect for a card like this.             * Ik vind het geweldig dat de "Cluck" -stempelset een volledig gesprek kan creëren met de verschillende text stempels. Het is gewoon perfect voor een kaart als deze.


See you tomorrow for an other BIG blogpost!             * Tot morgen voor een andere GROTE blogpost!

https://www.newtonsnookdesigns.com/land-borders-die-set/ https://www.newtonsnookdesigns.com/speech-bubbles-die-set/ https://www.newtonsnookdesigns.com/moo-die-set/ https://www.newtonsnookdesigns.com/moo/ https://www.newtonsnookdesigns.com/newton-celebrates-die-set/ https://www.newtonsnookdesigns.com/newton-celebrates/ https://www.newtonsnookdesigns.com/newtons-new-year/ https://www.newtonsnookdesigns.com/newtons-new-year-die-set/ https://www.newtonsnookdesigns.com/cluck/ https://www.newtonsnookdesigns.com/cluck-die-set/

vrijdag 22 februari 2019

Hidden Message Card

Happy Friday! Today I have fun interactive birthday card made for Newton's Nook Design.                 * Gelukkige vrijdag! Vandaag heb ik een leuke interactieve verjaardagskaart gemaakt voor Newton's Nook Design.


Below I will explain how I made the card.                 * Hieronder zal ik uitleggen hoe ik de kaart heb gemaakt.


1. I really wanted to create a card with an interactive piece that opened. Therefore I thought of using the 2nd frame dies from the ‘Framework’ Die set. To focus on the little interactive piece, a pattern was added. For that pattern I used the “Argyle” stencil set.                 * 1.Ik wilde echt een kaart maken met een interactief stuk dat word geopend. Daarom startte ik met de keuze van de  frame. Ik koos de tweede frame-snijmallen van de 'Framework' die-set. Om te focussen op het kleine interactieve stuk, werd er een patroon toegevoegd aan de binnenkant van de frame. Voor dat patroon heb ik de stencil set "Argyle" gebruikt.

2. After the base was created I started with the interactive piece. The size of the little piece is 3.35 inch (13,6 cm) x 2.87 inch (7,3 cm). When you did cut it out you can fold it in three piece like an accordion. The next thing was to find some sentiments and add it to the piece with embossing powder.  The sentiments come from the “Newon Rides West” and “Newton’s Birthday Bash” stamp sets.                 * 2. Nadat de basis was gemaakt, ben ik begonnen met het interactieve stuk. De afmeting van het kleine stuk is 3,35 inch (13,6 cm) x 2,87 inch (7,3 cm). Als je het hebt uitgeknipt, kun je het als een accordeon bij elkaar vouwen. Vervolgens zocht ik naar wat stempels om de tekst in embossingpoeder te stempelen. De tekst komt uit de "Newon Rides West" en "Newton's Birthday Bash" stempel sets.


3. For the front I used the smaller illustrated stamps from the “Newon Rides West” set and created my own cowboy pattern.                 * 3.Voor het voorkant heb ik de kleinere geïllustreerde stempels uit de "Newon Rides West" set gebruikt om mijn eigen cowboypatroon te maken.


4. On the inside of the interactive card I wanted to create a little scene, so therfore I created a background. This was made with a rectangular die and the “Wave” border die set. The paper piece got color with distress ink "Tumbled Glass" for the sky and for the hill “Antique Linnen” and “Vintage Photo”.                * 4. Aan de binnenkant van het ineractieve stuk wilde ik een kleine scène maken, dus hiervoor maakte ik een achtergrond. Dit werd gemaakt met een rechthoekige matrijs en de "Wave" border snijmal. Het stuk papier kreeg kleur met distress-inkt de kleur "Tumbled Glass" voor de lucht en "Antique Linnen" en "Vintage Photo" voor de heuvels .
 
5. To get a dreamy blue sky some water, white and blue ink was sprinkled on top.
                * Om een ​​dromerige blauwe lucht te krijgen, werd wat water, witte en blauwe inkt erop gestrooid.
 
6. As last step I colored the images (from the “Newon Rides West” and the “Christmas Haul” stamp sets with Copic Markers. Here are the colors I used:                * Als laatste stap kleurde ik de afbeeldingen (van de "Newon Rides West" en de "Christmas Haul" -stempelsets met Copic Markers. Dit zijn de kleuren die ik heb gebruikt:
  • Grey/Grijs: W5, W4, W3, W2, W1, W0, C5, C4, C3, C2 and BV29
  • Brown/Bruin: E37, E35, E33, E31
  • Light Green/Licht Groen: YG06, YG03, YG01, YG00
  • Dark Green/Donker Groen: G07, G05
  • Blue/Blauw: B29, B18, B16
  • Pink/Roos: RV13 and R11
In the end this is the end result.                * Uiteindelijk is dit het eindresultaat.


The surprise is inside, when the recipient opens the card. Perfect for a birthday.                * De verrassing zit vanbinnen, wanneer de ontvanger de kaart opent. Perfect voor een verjaardag.


I hope you enjoyed the this blog post and that you have a fabulous weekend.                * Ik hoop dat je deze blog post leuk vond verder wens ik jullie nog een fantastisch weekend.

http://www.newtonsnookdesigns.com/framework-die-set/ http://www.newtonsnookdesigns.com/sea-borders-die-set/ http://www.newtonsnookdesigns.com/argyle-stencil-set/ http://www.newtonsnookdesigns.com/christmas-haul-die-set/ http://www.newtonsnookdesigns.com/christmas-haul/ http://www.newtonsnookdesigns.com/newton-rides-west/ http://www.newtonsnookdesigns.com/newton-rides-west-die-set/ http://www.newtonsnookdesigns.com/newtons-birthday-bash/

vrijdag 21 september 2018

Interactive Friday

Hi everyone! Today I've an interactive post again for Newton's Nook Design. I  have a little bit of sad news too, I will stop my interactive series for the holidays. I still need to make a lot of Christmas cards and I will create a ton of idea's and tutorials for that. However I also have happy news; I have two interactive cards to celebrate the last day.             * Hallo iedereen! Vandaag heb ik weer een interactieve post voor Newton's Nook Design. Ik heb ook een beetje triest nieuws, want ik zal mijn interactieve serie stoppen voor de feestdagen. Ik wil veel kerstkaarten maken en daarvoor zal ik een aantal ideeën en tutorials maken. Ik heb echter ook nog tof nieuws; ik heb twee interactieve kaarten om de laatste dag te vieren.


The first card is a box pop up card. I used some dies to make it, but if you want to achieve this without dies I would love to forward you to a video someone made for Newton's Nook Design; Click here.             * De eerste kaart is een pop-up kaart. Ik gebruikte enkele snijmallen om mijn kaart te maken, maar als je dit wilt doen zonder snijmallen, verwijs ik je graag naar een video ontworpen voor Newton's Nook Design: Klik hier.


To make the box card a little more special I created a window in the bottom and created a river scene inside. You can make a window by just cutting out a rectangle on the front side before you put the box together. I also did glue a transparency on the inside of the frame to make the side stronger.             * Om de doos een beetje specialer te maken, heb ik een raam in de bodem geplaatst en een rivierlandschap gemaakt. Je kunt een raam maken door gewoon een rechthoek uit één van de kanten te snijden. Ik heb de transparantie aan de binnenkant van de doos geplakt om het frame te verstevigen. 


I love this card; it's just perfect to thank someone in a really special way.             * Ik ben dol op deze kaart, het is gewoon perfect om iemand op een speciale manier te bedanken.


The second card is a shaker card as you can see on the picture. I'm so happy with the dies for the "Newton Boo-tiful Night" stamp set wherefore I created a spooky cloud card.             * De tweede kaart is een schudkaart zoals je op de afbeelding kunt zien. Ik ben zo blij met de snijlmal voor de "Newton Boo-tiful Night", waarvoor ik een spookachtige wolkkaart maakte. 


I did put the "Trick Or Treat" words (from the "Halloween Trio" die set) on top of the shaker. to make that possible I used the Zyron sticker maker. As an extra special effect I did emboss the moon with glow in the dark embossing powder.             * Ik heb de "Trick Or Treat" -woorden (van de "Halloween Trio" die set) boven op de shaker geplaatst. om dat mogelijk te maken, heb ik Zyron sticker maker gebruikt. Voor een extra speciaal effect heb ik de maan in reliëf gestempelt met een glow in the dark embossing powder.


I hope you liked my tips and cards. Be sure to come back on Sunday. Something very special is coming! See you then!             * Ik hoop dat je mijn tips en kaarten leuk vond. Zorg ervoor dat je zondag terugkomt. Er komt iets heel bijzonders! Tot dan!
http://www.newtonsnookdesigns.com/frames-flags-die-set/ http://www.newtonsnookdesigns.com/winstons-lake-house-die-set/ http://www.newtonsnookdesigns.com/winstons-lake-house/ http://www.newtonsnookdesigns.com/narly-mermaids-die-set/ http://www.newtonsnookdesigns.com/narly-mermaids/ http://www.newtonsnookdesigns.com/manatee-rific-die-set/ http://www.newtonsnookdesigns.com/manatee-rific/ http://www.newtonsnookdesigns.com/halloween-trio-die-set/ http://www.newtonsnookdesigns.com/harvest-tails-die-set/ http://www.newtonsnookdesigns.com/harvest-tails/ http://www.newtonsnookdesigns.com/thankful-thoughts/ http://www.newtonsnookdesigns.com/newtons-boo-tiful-night/ http://www.newtonsnookdesigns.com/newtons-boo-tiful-night-die-set/ http://www.newtonsnookdesigns.com/land-borders-die-set/ http://www.newtonsnookdesigns.com/sea-borders-die-set/ http://www.newtonsnookdesigns.com/acetate-sheets/ http://www.newtonsnookdesigns.com/double-sided-adhesive-foam/