
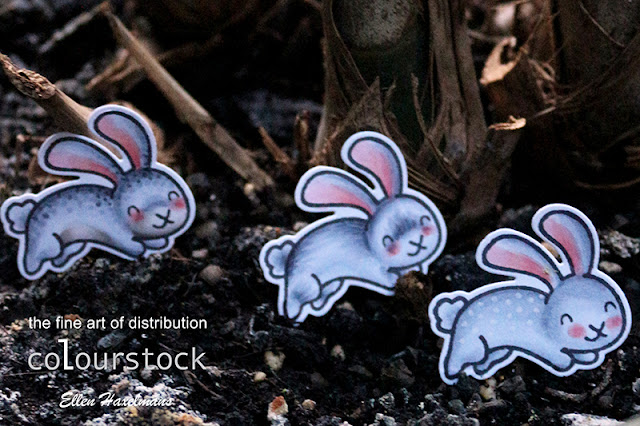
Hello everyone and more specifically today, hello Copic Lovers between us. Here I am again with a post for Colourstock. In this post I show how I color the same rabbit with different techniques. I like to use simple stamps to show the techniques, so they don't look too overwhelming. These are really easy to apply. You will see that if you're using three different techniques, the animals also look quite different. * Hallo iedereen en meer specifiek voor vandaag, hallo Copic
Lovers tussen ons. Hier ben ik weer met een post voor Colourstock. In deze post toon ik graag hoe ik hetzelfde konijntje
anders inkleur. Ik gebruik graag simpele stempels om de technieken die ik jullie wil bijbrengen niet te overweldigend te doen tonen. Vaak zijn de manieren echt gemakkelijk toe te passen. Je zal zien dat als je de drie verschillende technieken gebruikt, de diertjes er ook helemaal anders uit zien.
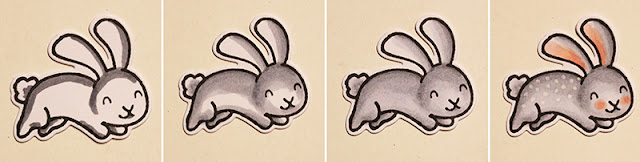
The first technique is the most simple. The bunny was colored in the normal way. This means from dark to light and circular movements. The colors I used are C5, C3, C1. To
make the animal a little more special, I used Copic Marker "0" and I put
dots on the back (this Copic Marker takes the color away). I also colored his cheeks and ears pink with the pins R22, R02 and R20. * De eerste techniek is de meest simpelste. Het konijntje kleurde ik op de normale manier in. Dit betekend van donker naar licht en met ronddraaiende bewegingen. De kleuren die ik gebruikte zijn C5, C3, C1. Om het diertje toch iets specialer te maken, gebruikte ik Copic Marker "0" en zette ik stippen op de rug (deze Copic Marker neemt de kleur weg). Daarnaast kleurde ik zijn wangen en oren roze met de stiften R22, R02 en R20.
The second technique fits nice between the first and third technique. I
colored the base the same way as in the first technique (and also with the same
color), but made it look a little different in the fur around the mouth
and belly. For the belly and mouth, I use a different color family W (more specific W5, W3 and W0). In addition, I put dots in the dark spots on the back, head and ears. For the dots I go from dark to light (C5, C3 and C1). Make the dots gradually disappear. Personally, I find that this technique not so much different from
our previous technique, yet it looks like you have lot more talent
in the coloring. * De tweede techniek zit mooi tussen techniek één en drie die ik hier toon. Ik kleur op dezelfde manier als in de eerste techniek (en ook met dezelfde kleuren), maar ik hou rekening met kleurverschillen in de vacht rond de mond- en buikstreek. Voor de buik en mond gebruik ik een andere kleurfamilie W (namelijk W5, W3 en W0). Daarnaast zet ik stipjes in de donkere plekjes op de rug, hoofd en oren. Ook voor de stippen ga ik van donker naar licht (C5, C3 en C1). Teken steeds minder stippen, zodat de stippen geleidelijk verdwijnen. Persoonlijk vind ik dat deze techniek niet zo veel verschilt van onze vorige techniek, toch lijkt het al snel of je veel meer talent hebt in het kleuren.

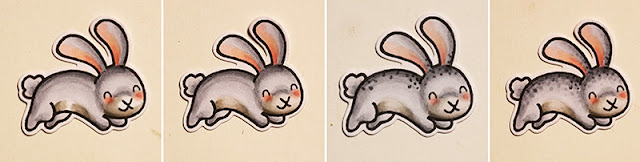
The
last technique I usually use for more detailed and more realistic
stamps, yet it is still possible at a slightly simpler image. I colored here also with C5, C3 and C1, but this time you can see my dark color are on other spots. Think about where you have the shade and where the hairs appear. Usually that is in places where there are folds in the body such as a knee or a nose that's sticking out. In order to show off the the lines / hair better, I go over it again with the same Copic Markers. * De laatste techniek gebruik ik meestal voor gedetailleerdere en meer realistische stempelafdrukken, toch is het nog mogelijk op een iets simpelere afdruk. Ik kleur hier ook met C5, C3 en C1, maar deze keer zie ik dat ik mijn donkere kleur op andere plekjes teken. Denk na over waar je de schaduw hebt en waar de haartjes te voorschijn komen. Meestal is dat op plekken waar er plooien zijn in het lichaam zoals een knie of het uitsteken van een neus. Om de streepjes/haren nog wat beter te verschijn te laten komen, ga ik er nog eens over met de zelfde Copic Markers.
Now it's your turn to color! What is your favorite technique 1, 2 or 3? * Nu is het jou beurt om te kleuren! Welke techniek is jou favoriet 1, 2 of 3?

WOW Ellen! Fantastic examples of techniques you've shared today! I'm pinning this for future reference, thanks so much for sharing this!
BeantwoordenVerwijderenWat een leuke konijntjes. Bedankt voor de uitleg.
BeantwoordenVerwijderenamazing coloring!
BeantwoordenVerwijderendo share how to color kitties :D