
Today I'm super excited to be part of the Collaboration between Newton's Nook Design and Xyron. As you might know the whole week you could see a lot of inspiration on the NND blog and Xyron Facebookpage. Today Tatiana and me are closing this fun week. * Vandaag ben ik zeer verheugd om deel uit te maken van de samewerking tussen Newton's Nook Design en Xyron. Zoals je misschien al hebt gezien, kan je de hele week, inspiratie opdoen op de NND blog en Xyron Facebookpage. Vandaag sluiten Tatiana en ik deze leuke week af.

I made a tag with a magnetic closure. Below you can find a step by step tutorial so you can recreate if you want. * Ik heb tags gemaakt met een magnetische sluiting. Hieronder vind je stapsgewijze uitleg zodat je het recreëren als je dat wilt.

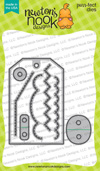
1. The base of this project is a tag that you can open and close. To make this happen you fold your paper and place your die just above the fold. Only then the tag will not cut the top. In addition, I also did not put my cutting plate completely over the bottom of my tag die. Also that part will not completely cut. Maybe this explanation seems a little difficult, but if you take a look at the pictures I hope this will be clear. *1. De basis van dit project is een tag die je kan openen en sluiten. Om dit te realiseren vouw je je papier en plaats je de stans net boven de vouw. Alleen dan zal de tag de bovenkant niet snijden. Bovendien heb ik mijn snijplaat ook niet volledig op de bodem van mijn tag-snijmal gelegd. Ook dat deel zal niet volledig snijden. Misschien lijkt deze uitleg een beetje moeilijk, maar als je naar de foto's kijkt, hoop ik dat dit duidelijk zal zijn.

2. After the first roll between your die cutting machine, you cut the tag again. Only than it becomes longer. Again you don't cut the top part of the tag. * Na de eerste draai tussen uw stansmachine, snijdt u de tag opnieuw. Alleen dan word ze langer. Opnieuw snijd je het bovenste deel van de tag niet.
3. For the word 'wishing' from the "Balloon Shaker" dies I used the "1.5 Sticker Maker" from Xyron. This product is really one of my favorite items to glue word dies or small elements! Other glues really don't have the same result. Liquid glue gives messy edges with smaller items or it's hard to not tear the paper with other kind of glue's. Seriously I really love this! * 3. Voor het woord 'wishing' van de 'Ballonshaker' stans, heb ik de '1.5 Sticker Maker' van Xyron gebruikt. Dit product is echt een van mijn favoriete items om woordmallen of kleine elementen te lijmen! Andere lijmen hebben niet echt hetzelfde resultaat. Vloeibare lijm geeft rommelige lijmranden met kleinere items of het is moeilijk om het papier niet te scheuren met andere soorten lijm. Serieus, ik hou er echt van!

4. The background was made with oxide ink and the "Serene Stripes" stencil. The top of the card had a pretty reinforcement ring. The Xyron "Terisa collins Mega Runner" is perfect to glue the ring on the tag. I love that the gluehas little dots, this ensures that when you go out of the 'lines' the glue doesn’t show as much as a full glue stripe. * 4. De achtergrond is gemaakt met oxide-inkt en de "Serene Stripes" sjabloon. De bovenkant van de kaart had een mooie versterkingsring. De Xyron "Terisa collins Mega Runner" is perfect om de ring op de tag te lijmen. Ik hou ervan dat de lijm kleine bolletjes heeft, dit zorgt ervoor dat wanneer je uit de 'lijnen' lijmt, de lijm niet zoveel tevoorschijn komt dan een volledige lijmstreep.
5. As last step I stamped the text in different colors by covering up a part of the stamp. After that I used the magnetic tape at both inside pieces from the tags. This makes it just so fun to open and close. * 5. Als laatste stap heb ik een mooie tekst in verschillende kleuren gestempeld door een deel van de stempel te bedekken tijdens het inken. Daarna gebruikte ik de magnetische tape aan beide binnenste stukken van de tags. Dit maakt het gewoon zo leuk om te openen en te sluiten.
This is the result: * Uiteindelijk is dit het resultaat:

Also the inside is finished... * Ook de binnenkant is af...

Would you like to win a Prize pack including a Mega Runner from Xyron and a $25 store credit to Newton’s Nook Designs? Here's how to win: Leave a comment on the NND & Design Team blog posts using Xyron products all week (June 25-29) to enter. One winner will be randomly chosen from blog posts throughout the week so the more posts you leave comments on the better your chances are of winning! You have until Friday June 29th at midnight EST to comment. The winner will be announced on the NND blog post on Monday, July 2nd. * Wil je een prijzenpakket winnen, inclusief een Mega Runner van Xyron en een tegoed van $ 25 voor Newton's Nook Designs? Hier is hoe je kan winnen: Laat een commentaar achter op de NND & Design Team-blogposts met Xyron-producten gedurende de hele week (25-29 juni). Slechts één winnaar wordt willekeurig gekozen uit blogberichten gedurende de week. Je hebt tot vrijdag 29 juni om middernacht EST om commentaar te geven. De winnaar wordt bekend gemaakt op de NND-blogpost op maandag 2 juli.
Xyron will also be giving away a prize pack! Make sure to visit the Xyron facebook page each day this week for inspiration and leave comments there for another chance to win! * Xyron geeft ook een prijzenpakket weg! Zorg ervoor dat je elke dag de Xyron facebook page bezoekt.


love how you made this tag - very sweet and perfect image for using on a gift:)
BeantwoordenVerwijderenThat's a cool idea and I love the bright colors on the image.
BeantwoordenVerwijderenThis is just lovely! Very cheerful. Love this set;
BeantwoordenVerwijderenI think I better add it to the wish list. :-)
thanks for the tip on eztending the
BeantwoordenVerwijderenlength of the tag. It is very
pretty. Wonder what's in that big
box???? thanks for sharing
txmlhl(at)yahoo(dot)com
Pretty tag! Love the tip on lengthening the tag! Awesome stenciled background and coloring on your project!
BeantwoordenVerwijderenSuch a pretty tag! I love making tags for gift bags and especially for kids gifts, because they really aren't interested in a card. Thanks for the tips on doubling the tag and extending the length. It's great to have the inside area for a sentiment or to write a message.
BeantwoordenVerwijderenSuper sweet and adorable card! I love that it is in the shape of a tag.
BeantwoordenVerwijderenSuper cute love the colors!
BeantwoordenVerwijderenSuch cute and creative projects!
BeantwoordenVerwijderenSuch a cute birthday tag!
BeantwoordenVerwijderenThis is such a lovely tag !! Love the sweet pastel pink.
BeantwoordenVerwijderen[margessw(at)icloud(dot)com]
This is such a pretty tag! I love how you created a magnetic closure :)
BeantwoordenVerwijderenLove your tag ~ it is very sweet! Thank you for sharing!!
BeantwoordenVerwijderenso very cute tag!
BeantwoordenVerwijderenhugs
Such a BEAUTIFUL tag! The coloring is GORGEOUS!
BeantwoordenVerwijderen