Posts tonen met het label SVG. Alle posts tonen

donderdag 11 juli 2024

Cutest Beach Bag

Hi friends, welcome to my blog, today I got a new post for you made for Printable Cuttable Creatables. Here I'm showing you a pencil case or a beach bag, especially with summer in mind.                        * Hallo vrienden, welkom op mijn blog, vandaag heb ik een nieuw bericht voor jullie, gemaakt voor Printable Cuttable Creatables. Hier laat ik je een etui of een strandtas zien, vooral met de zomer in gedachten.

I’m using the new: ‘Sea Coral’ and the ‘Cute Sea Turtle’ SVG File.                        * Ik gebruik het nieuwe: ‘Sea Coral’ en het ‘Cute Sea Turtle’ SVG-bestand.


In my opinion the turtle does fit perfectly on the green bag. From that moment I had the idea of ​​using a pun  and looked it up on the internet. I then finished the scene further with the sea plants.                        * Naar mijn mening past de schildpad perfect op de groene tas. Vanaf dat moment had ik het idee om een ​​woordspeling te gebruiken en zocht het verder op, op internet. Vervolgens heb ik de scène verder afgewerkt met de zeeplanten. 

Once I was happy with how all the artwork was positioned, I cut the elements out on HTV with my Cricut machine. The last step was to apply everything with a Heat Transfer tool.                        * Toen ik eenmaal tevreden was met hoe alle illustraties waren gepositioneerd, seed ik alle elementen uit met mijn Cricut-machine op HTV uitgesneden. Als laatste stap gebruikte ik een Heat Transfer-tool om alles aan te brengen.

The bag is perfect for taking your pencils to the beach, or sunscreen and money!                        * Het zakje is perfect om je potloden mee te nemen naar het strand, of zonnebrandcrème en geld!

I hope you are inspired and you can craft the stress away this summer!                         * Ik hoop dat je geïnspireerd bent en dat je deze zomer de stress kunt wegknutselen!


I also received an Affiliate Link. This means that PCC rewards me for orders that you place on their website. It costs you nothing extra, but it does give me a nice advantage. You help me a lot if you place an order true this link: www.printablecuttablecreatables.com/?pcc=11. In return I have a nice discount code for you: 'craftyellen15'. This gives you a 15% discount during the entire design team period!                       * Ik heb ook een affiliate-link ontvangen. Dit betekent dat PCC mij beloont voor bestellingen die u op hun website plaatst. Het kost jou niets extra, maar levert mij wel een mooi voordeel op. Je helpt mij enorm als je een bestelling plaatst via deze link: www.printablecuttablecreatables.com/?pcc=11. Als tegenprestatie heb ik een leuke kortingscode voor je: 'craftyellen15'. Hiermee krijg je gedurende de gehele ontwerpteamperiode 15% korting!

dinsdag 12 maart 2024

Making Waterproof Stickers


Hello, today we will be making waterproof stickers for the Printable Cuttable Creatables! 
For this post I’m using a ton of fun designs from PCC:                       * Hallo, vandaag gaan we waterdichte stickers maken voor de Printable Cuttable Creatables!
Voor dit bericht gebruik ik een heleboel leuke ontwerpen van PCC:

Other supplies:                       * Overige benodigdheden:
  • Cricut Machine (I’m using a Cricut Maker)                        * Cricut-machine (ik gebruik een Cricut Maker)
  • StandardGrip Mat                       * StandaardGrip-mat
  • Sticker Paper (I’m using the ‘Cricut Printable Waterproof Sticker Set – Transparant Holografic’)                        * Stickerpapier (ik gebruik de 'Cricut Printable Waterproof Sticker Set – Transparent Holografic')
  • Printer                       * Printer


Cricut has a new feature for making stickers ‘Create Sticker’ (this feature is on the Beta Version of Cricut Design Space and only accessible for paying persons).                       * Cricut heeft een nieuwe functie voor het maken van stickers 'Sticker Bewerken' (deze functie bevindt zich in de bètaversie van Cricut Design Space en is alleen toegankelijk voor betalende personen).


First you have to select your image and click on 'Create Sticker'. You can find the button on the top.                       * Eerst moet je je afbeelding selecteren en op 'Sticker Bewerken' klikken. Je vindt de knop bovenaan.

You can choose between two options:                       * Je kan kiezen uit twee opties:
  • Die Cut Stickers: The Cricut machine will complete cut true all layers of the sticker paper.                       * Gestanste stickers: de Cricut-machine snijdt alle lagen van het stickerpapier uit.
  • Kiss Cut Stickers: The Cricut machine will cut with a lighter touch. The top layer is the only thing cut, leaving the liner intact. This is perfect for a Sticker sheet for example for planners.                       * Kiss Cut-stickers: de Cricut-machine snijdt met een lichtere aanraking. De bovenste laag is het enige dat wordt gesneden, waardoor de voering intact blijft. Dit is perfect voor een stickervel voor bijvoorbeeld planners.
For this post I’m using the first option with a custom border from 0,30 cm (0,12 inches).                       * Voor dit bericht gebruik ik de eerste optie met een aangepaste rand van 0,30 cm (0,12 inch).


The sticker paper I’m using is perfect for my Inkjet printer. When the sheet is printed out it’s time to layer the holographic layer on top.                       * Het stickerpapier dat ik gebruik is perfect voor mijn inkjetprinter. Wanneer het vel is afgedrukt, is het tijd om de holografische laag er bovenop te leggen.


What I did wrong!: On the pictures you can see I layered the holographic paper completely on top of the sticker paper. That’s not good. You have to only stick the paper on the illustrations and NEVER COVER UP THE BLACK READING LINES (L-shapes on each corner). Only than Cricut can view where to cut.                       * Wat ik verkeerd heb gedaan!: Op de foto's kun je zien dat ik het holografisch papier volledig op het stickerpapier heb gelegd. Dat is niet goed. Je hoeft alleen het papier op de illustraties te plakken en NOOIT DE ZWARTE LEESLIJNEN (L-vormen op elke hoek) af te dekken. Alleen dan kan Cricut zien waar er moet worden gesneden.


I’m using a little more pressure when cutting the designs (it’s an option you can choose right before your machine starts cutting).                       * Ik oefen wat meer druk uit bij het snijden van de ontwerpen (dit is een optie die je kan kiezen precies voordat je machine begint met snijden).

When it’s finally cut, it’s done!                        * Als het eindelijk is gesneden, is het klaar!


I cannot wait to use these cute stickers on my mug or send them out to friends.                       * Ik kan niet wachten om deze schattige stickers op mijn mok te gebruiken of ze naar vrienden te sturen.

Want to see more ways for sticker making? https://craftyellenh.blogspot.com/2023/08/making-sticker-sheet.html                       * Wil je meer manieren om stickers te maken zien?: https://craftyellenh.blogspot.com/2023/08/making-sticker-sheet.html


I also received an Affiliate Link. This means that PCC rewards me for orders that you place on their website. It costs you nothing extra, but it does give me a nice advantage. You help me a lot if you place an order true this link: www.printablecuttablecreatables.com/?pcc=11. In return I have a nice discount code for you: 'craftyellen15'. This gives you a 15% discount during the entire design team period!                       * Ik heb ook een affiliate-link ontvangen. Dit betekent dat PCC mij beloont voor bestellingen die u op hun website plaatst. Het kost jou niets extra, maar levert mij wel een mooi voordeel op. Je helpt mij enorm als je een bestelling plaatst via deze link: www.printablecuttablecreatables.com/?pcc=11. Als tegenprestatie heb ik een leuke kortingscode voor je: 'craftyellen15'. Hiermee krijg je gedurende de gehele ontwerpteamperiode 15% korting!

dinsdag 16 januari 2024

DIY Cookie Jar Gift Idea

Hello creative friends! I’m happy to spent another design team term with you for the Printable Cuttable Creatable team!                        * Hallo creatievelingen! Ik ben blij dat ik weer een termijn van het ontwerpteam van Printable Cuttable Creatable met jullie kan doorbrengen!

Today I’ve a little post for a cute cookie gift idea. I dressed up a cookie jar with the “One Smart Cookie Girl” SVG File and the “Scalloped Hearts Frames Set” FREE SVG Cut Files.                        * Vandaag heb ik een kleine post met een schattig cadeau-idee voor koekjes. Ik heb een koektrommel gedecoreerd met het “One Smart Cookie Girl” SVG-bestand en de “Scalloped Hearts Frames Set” FREE SVG-cut-bestanden.

In Belgium, many university students have exams during this period. Of course they deserve a little encouragement or you can also see this as a small Valentine's gift. Nothing easier than cutting out the layers with your cutting machine and add them in order on a jar.                        * In België hebben veel universiteitsstudenten in deze periode examens. Uiteraard verdienen ze wel een beetje aanmoediging of je kunt dit ook zien als een klein Valentijnscadeautje. Niets makkelijker dan de laagjes uit te snijden met je snijmachine en ze in volgorde op een potje te kleven.

At the top I had to be careful to stick the circle in the middle.                         * Bovenaan moest ik oppassen dat ik de cirkel in het midden plakte.

Don't you think it's a great gift too?                         * Vind jij het ook geen geweldig cadeau?


I also received an Affiliate Link. This means that PCC rewards me for orders that you place on their website. It costs you nothing extra, but it does give me a nice advantage. You help me a lot if you place an order true this link: www.printablecuttablecreatables.com/?pcc=11. In return I have a nice discount code for you: 'craftyellen15'. This gives you a 15% discount during the entire design team period!                       * Ik heb ook een affiliate-link ontvangen. Dit betekent dat PCC mij beloont voor bestellingen die u op hun website plaatst. Het kost jou niets extra, maar levert mij wel een mooi voordeel op. Je helpt mij enorm als je een bestelling plaatst via deze link: www.printablecuttablecreatables.com/?pcc=11. Als tegenprestatie heb ik een leuke kortingscode voor je: 'craftyellen15'. Hiermee krijg je gedurende de gehele ontwerpteamperiode 15% korting!

zondag 10 december 2023

How to Make a Light Box

Hi crafty friends! I decided to create a light box using the “Sleigh All Day” SVG File from Printable Cuttable Creatables.                        * Hallo creatievelingen! Ik besloot een lichtbak te maken met het SVG-bestand "Sleigh All Day" van Printable Cuttable Creatables.

What do you need:                        * Wat heb je nodig:

  • A wooden box with open front / Een houten kist met open voorkant.
  • Star Foil/3D Foil / Sterfolie/3D-foli
  • Mini lights/craft lights / Minilampen/knutsellampen
  • A mini wood drill / Een kleine houtboor
  • A hot glue gun / Een heet lijmpistool
  • Double sided tape / Dubbelzijdige tape
  • Tape / Plakband
  • A Cutting machine that can cut the “Sleigh All Day” SVG File / Een snijmachine die het SVG-bestand "Sleigh All Day" kan snijden
  • Vinyl / Vinyl
  • Transfer tape / Transfer tape 

Now onto the tutorial:                        * Nu verder met de tutorial:

  1. Drill a hole in the box (or ask your husband like I did). This is a hole through which the lights must go true.                        * Boor een gaatje in de doos (of vraag het aan je man zoals ik deed). Dit is een gaatje waar de lichten doorheen moeten gaan.
  2. Push the lights true the hole and glue the battery holder to the back of the box with your glue gun.                        * Duw de lampjes tot in het gaatje en lijm de batterijhouder met je lijmpistool aan de achterkant van de doos.
  1. I secured the lights in the box with tape. I also used double sided tape on the edge of the box. The 3D foil is I fastened with the double-sided tape.                        * De lampjes in de doos heb ik met tape vastgemaakt. Ik heb ook dubbelzijdig tape op de rand van de doos gebruikt. De 3D folie heb ik vastgeplakt met die dubbelzijdig tape.
  2. 4. As a final step I positioned the design on the 3D foil.                         * Als laatste stap plaatste ik het ontwerp op de 3D-folie.

 The 3D foil ensures that the lights look like stars. It’s super magical! For sure with that Santa in a sleigh on top.                         * De 3D-folie zorgt ervoor dat de lampjes op sterren lijken. Het is supermagisch! Zeker met die Kerstman in een slee er bovenop.


I also received an Affiliate Link. This means that PCC rewards me for orders that you place on their website. It costs you nothing extra, but it does give me a nice advantage. You help me a lot if you place an order true this link: www.printablecuttablecreatables.com/?pcc=11. In return I have a nice discount code for you: 'craftyellen15'. This gives you a 15% discount during the entire design team period!                       * Ik heb ook een affiliate-link ontvangen. Dit betekent dat PCC mij beloont voor bestellingen die u op hun website plaatst. Het kost jou niets extra, maar levert mij wel een mooi voordeel op. Je helpt mij enorm als je een bestelling plaatst via deze link: www.printablecuttablecreatables.com/?pcc=11. Als tegenprestatie heb ik een leuke kortingscode voor je: 'craftyellen15'. Hiermee krijg je gedurende de gehele ontwerpteamperiode 15% korting!

donderdag 28 september 2023

Fun DIY Fall Home Decor Ideas

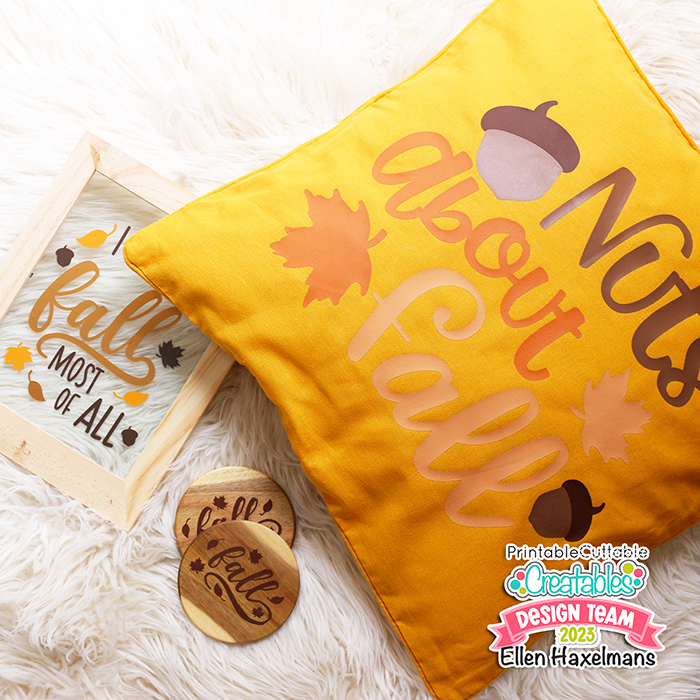
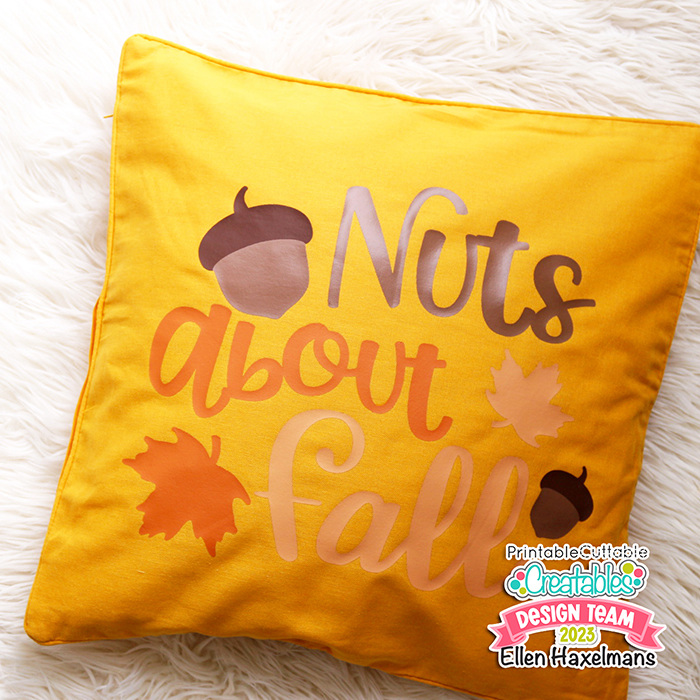
Hello everyone!! I'm here again with some super fun fall home decore idea’s. Printable Cuttable Creatables has pretty fall SVG’s that can be used on their own, but also make a pretty ensemble! On this post I’m using the “Nuts About Fall”, “I Love Fall Most of All” and the (free) “Fall” SVG Files.                        * Dag iedereen!! Ik ben hier weer met een aantal superleuke herfstdecoratie-ideeën.
Printable Cuttable Creatables heeft mooie herfst-SVG's die op zichzelf kunnen worden gebruikt, maar ook een mooi ensemble kunnen vormen! Voor dit bericht gebruik ik de “Nuts About Fall”, “I Love Fall Most of All” en de (gratis) “Fall” SVG-bestanden.

This mustard pillowcase was screaming for some fall decoration. To make this you need Heat Transfer Vinyl (I’m using 4 different brown colors).                        * Dit mosterdkleurige kussensloop schreeuwde om wat herfstdecoratie. Om dit te maken heb je flex nodig (ik gebruik 4 verschillende bruine kleuren).


Decorating your own pillow cases is really budget friendly. Of course is super pretty next to a green or orange pillow.                        * Je eigen kussenslopen versieren is echt budgetvriendelijk. Staat natuurlijk super mooi naast een groen of oranje kussen.


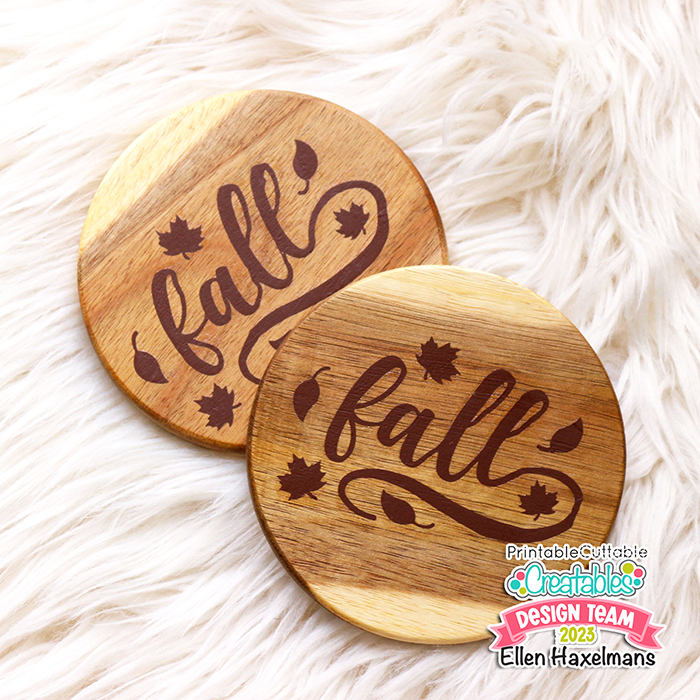
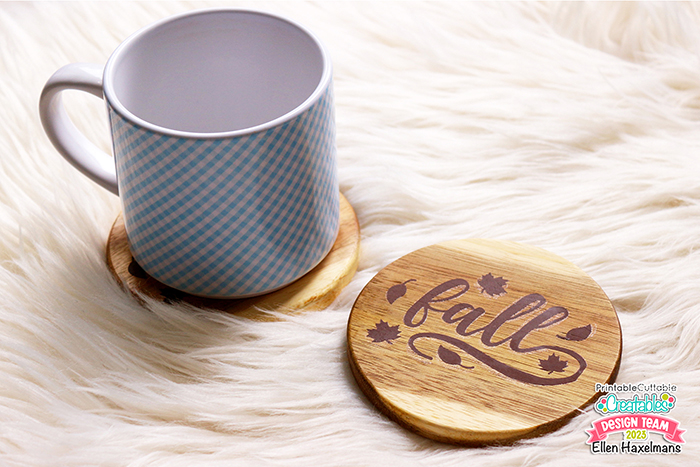
A smaller detail in home decor can be uplifting, for example some wooden coasters. These coaster where also very cheap (I bought them in a sort of dollar store).                        * Een kleiner detail in de woninginrichting kunnen enkele houten onderzetters zijn. Deze onderzetters waren ook erg goedkoop (ik kocht ze in een soort dollar store).


Just as I did with one of my bookmarks (I shared it recently, check it out) I used Heat Transfer Vinyl to decorate the coasters. They match my self-made mug perfectly (more information here).                         * Net zoals ik deed met een van mijn bladwijzers (ik heb hem onlangs gedeeld, meer info hier) heb ik Heat Transfer Vinyl gebruikt om de onderleggers te versieren. Ze passen perfect bij mijn zelfgemaakte mok (meer informatie hier). 


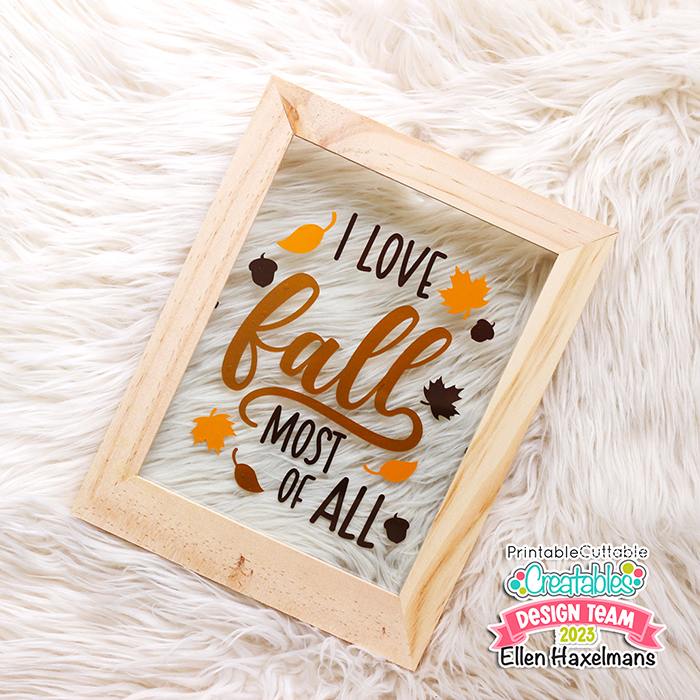
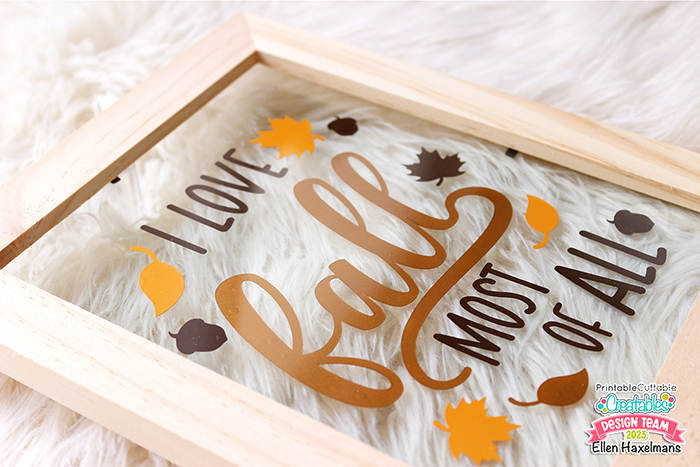
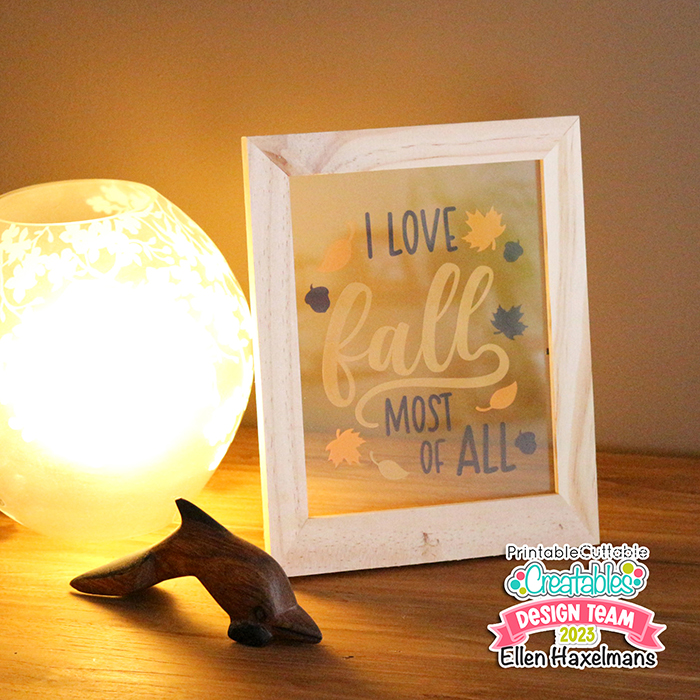
In the same dollar store I did buy some frames with 2 glass sides. I really love these frames to add regular vinyl. I did cut the “I Love Fall Most of All” files in 3 different colors (the word fall is even in a pretty bronze color).                        * In dezelfde dollarstore kocht ik een aantal lijsten met 2 glazen zijdes. Ik ben echt dol op deze frames om gewoon vinyl toe te voegen. Ik heb de “I Love Fall Most of All” bestanden in 3 verschillende kleuren geknipt (het woord herfst is zelfs in een mooie bronskleur).


Quick tip; I place the glass without vinyl on top of the glass with vinyl. As a result, the vinyl layer is protected by the other glass. No dust or other dirt can get stuck between the vinyl and everything stays neatly during the cleaning the frame when needed.                        * Snelle tip; Het glas zonder vinyl plaats ik op het glas met vinyl. Hierdoor wordt de vinyllaag beschermd door het glas. Er kan geen stof of ander vuil tussen het vinyl blijven zitten en alles blijft netjes schoon tijdens het schoonmaken van het frame wanneer dat nodig is.


Now I’m ready to put on the candles and take out a blanket for a movie night in my cozy house!                        * Nu ben ik klaar om de kaarsen te doen branden en een dekentje tevoorschijn te halen voor een filmavondje in mijn gezellige huis!


I also received an Affiliate Link. This means that PCC rewards me for orders that you place on their website. It costs you nothing extra, but it does give me a nice advantage. You help me a lot if you place an order true this link: www.printablecuttablecreatables.com/?pcc=11. In return I have a nice discount code for you: 'craftyellen15'. This gives you a 15% discount during the entire design team period!                       * Ik heb ook een affiliate-link ontvangen. Dit betekent dat PCC mij beloont voor bestellingen die u op hun website plaatst. Het kost jou niets extra, maar levert mij wel een mooi voordeel op. Je helpt mij enorm als je een bestelling plaatst via deze link: www.printablecuttablecreatables.com/?pcc=11. Als tegenprestatie heb ik een leuke kortingscode voor je: 'craftyellen15'. Hiermee krijg je gedurende de gehele ontwerpteamperiode 15% korting!

donderdag 17 augustus 2023

Making a Sticker Sheet

Hello everyone, today I’m using my cricut to make a sticker sheet and I will explain how you can do that.                        * Hallo allemaal, vandaag gebruik ik mijn cricut om een ​​stickervel te maken en ik zal uitleggen hoe je het moet doen.

For the stickers I used a lot of retro SVG's from Printable Cutable Creatables (the ‘Vintage Roller Skates’, ‘Hippie Sunglasses Retro’, ‘Hippie Van Front Retro’, ‘Hippie Guitar Retro’, ‘Mom Retro Titles’ SVG Files and the ‘Spring Gingham Check' Seamless Patterns & Digital Paper Pack).                        * Voor de stickers heb ik veel retro SVG's van Printable Cutable Creatables gebruikt (de 'Vintage Roller Skates', 'Hippie Sunglasses Retro', 'Hippie Van Front Retro', 'Hippie Guitar Retro', 'Mom Retro Titles' SVG Files en de 'Spring Gingham Check' pattern & digitaal papierpakket).

Before you start, calibrate your machine for ‘Print Then Cut’. This ensures the machine will cut precisely along the edge of your printed images. Don’t skip this step! This step is really important to do before you print the sticker sheet!                        * Alvorens je begint, kan je best je machine kalibreren voor 'Print Then Cut'. Dit zorgt ervoor dat de machine precies langs de rand van je afgedrukte afbeeldingen snijdt. Sla deze stap niet over! Deze stap is echt belangrijk voordat je het stickervel print!

First I will tell you how I made the background of the sheet.                        * Eerst zal ik je vertellen hoe ik de achtergrond van het blad heb gemaakt.
  1. Upload the preferred paper (I used the ‘Spring Gingham Check’) and I did cut it in a rectangular shape.                        * 1. Upload het gewenste papier (ik heb de 'Spring Gingham Check' gebruikt) en sneed het in een  rechthoekige vorm.

  2. Delete the overspill and color the black shape white. Do not move the white layer, because we need them to be perfectly on top of each other. Cut the white frame, so that you have a small strip left. Next delete the overspill.                        * 2. Verwijder het overtollige stuk van het digitaal papier en kleur de zwarte vorm wit. Verplaats de witte laag niet, want we hebben ze nog nodig (we willen ze perfect op elkaar laten liggen). Knip het witte frame uit, zodat je een klein strookje overhoudt. Verwijder vervolgens opnieuw het overtollige.

  3. Use the “flatten” button to make them as one image. If you want, you can write a text on the white  piece and use the flatten button again.                        * 3. Gebruik de knop "flatten" om de vorm als één afbeelding te maken. Als je wil, kun je ook een tekst op het witte stuk schrijven en opnieuw de flatten-knop gebruiken.

Let’s make the stickers…                        * Laten we de stickers maken...

  1.       Upload all illustrations and mark them as linetype: ‘print and cut’. Then add the Offset feature to make lines around the illustrations. The distance is 0,30 cm (or 0,118 inch), but you can make the outline as big as you want.                        * 1. Upload alle illustraties en gebruik het als bediening: ‘printen en snijden’. Voeg vervolgens de Offset-functie toe om lijnen rond de illustraties te maken. De afstand op mijn stickervel is 0,30 cm (of 0,118 inch), maar je kunt de omtrek zo groot maken als je wil.

  2. Give the offset a white color. Make sure all images with their offset are flattened if it hasn’t already been.                        * 2. Geef de offset een witte kleur. Zorg ervoor dat alle afbeeldingen met hun offset als laag aan elkaar zijn vastgemaakt, als dit nog niet is gebeurd.

  3.  Flatten all illustrations into a whole. Once all your stickers are ready, click Make It. Now you can print and cut your sticker sheet. I’m cutting the sheet as a ‘washi tape’.                        * 3. Maak alle illustraties nog eens vast tot één geheel. Zodra al je stickers klaar zijn, klik je op Make It. Nu kun je je stickervel printen en uitknippen. Ik snij het vel als een ‘washi tape’. 


Little extra info: In a few parts in Belgium we celebrate Mother’s day on the 15th of August. That’s why I loved the ‘Mom’ sticker in the sheet.                        * Een kleine beetje extra info: In een paar delen van België vieren we Moederdag op 15 augustus. Daarom hield ik van de 'Mom'-sticker in het vel.


I hope you try out this technique. If you have any questions, please send out a comment bellow or in find help in out Facebook group. Happy crafting!                        * Ik hoop dat je deze techniek uitprobeert. Als je vragen hebt, stuur dan een reactie hieronder of zoek hulp in onze Facebook-groep. Veel plezier met knutselen!


I also received an Affiliate Link. This means that PCC rewards me for orders that you place on their website. It costs you nothing extra, but it does give me a nice advantage. 
You help me a lot if you place an order true this link: www.printablecuttablecreatables.com/?pcc=11. In return I have a nice discount code for you: 'craftyellen15'. This gives you a 15% discount during the entire design team period!                       * Ik heb ook een affiliate-link ontvangen. Dit betekent dat PCC mij beloont voor bestellingen die u op hun website plaatst. Het kost jou niets extra, maar levert mij wel een mooi voordeel op. Je helpt mij enorm als je een bestelling plaatst via deze link: www.printablecuttablecreatables.com/?pcc=11. Als tegenprestatie heb ik een leuke kortingscode voor je: 'craftyellen15'. Hiermee krijg je gedurende de gehele ontwerpteamperiode 15% korting!